
Getting hands-on is one of the best ways to learn about new Salesforce products and features — and what better way than taking a spin in a Developer Edition (DE) org? Developer Edition orgs are a free, full-featured version of Enterprise Edition where you can experiment and iterate without worrying about impacting your production org or running up a bill. Best of all, Agentforce and Data Cloud come pre-enabled, so you can start tinkering with the latest and greatest features.
But if you’re anything like me, a blank slate can feel like a difficult place to start. To help you hit the ground running, we’ve put together five easy exercises that’ll have you grounding agents and connecting unstructured data in no time!
1. Get started fast
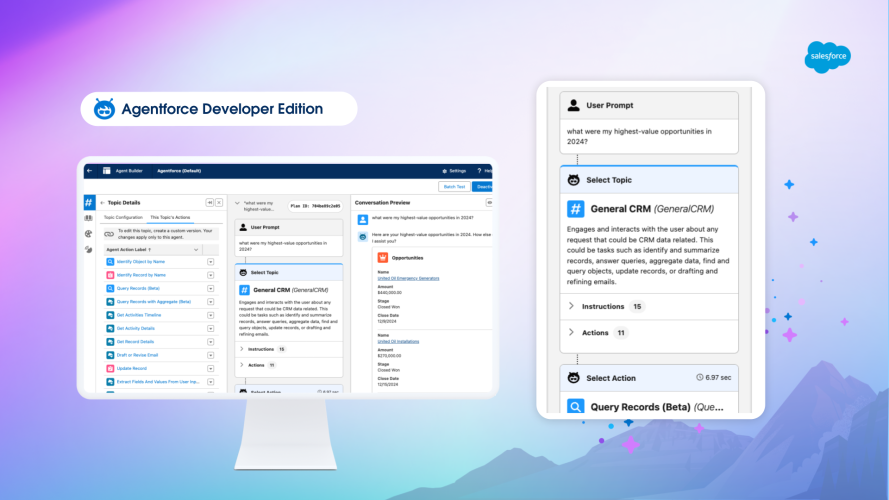
When you first log into your DE org, you’ll be greeted with an Agentforce welcome screen. Since I was pretty eager to get my hands on an agent, I skipped the intro activities and went straight to the setup menu by clicking the gear icon in the upper-right-hand toolbar and selecting “Setup.”
From there, type “agents” into the Quick Find bar and select Agents. Scroll down to the bottom of the page and click “Agentforce (Default).” Click the “Open in Builder” button in the upper-right-hand corner. You’ve just launched Agent Builder!
Here, you can start playing with the default agent that ships with Agentforce. In DE, it comes preconfigured with two topics so you can start putting your agent through its paces. First, let’s take a look at the preconfigured topics to see what actions this agent can execute out of the box.
To see the available actions within a topic, click the topic label, then navigate to the “This Topic’s Actions” tab. You’ll see the General CRM topic contains a range of actions for retrieving, editing and summarizing CRM data. Let’s try asking the agent to query some data in our org. You can type in “what were my highest-value opportunities in 2024?” Remember, any LLM-powered tool is non-deterministic, so if you see an error or unexpected output, try refreshing the tab or rephrasing your question.
Looks like our DE org has a great sales pipeline! You can explore further by asking Agentforce to summarize the last two years of activity with United Oil, or to generate a list of most important contacts.
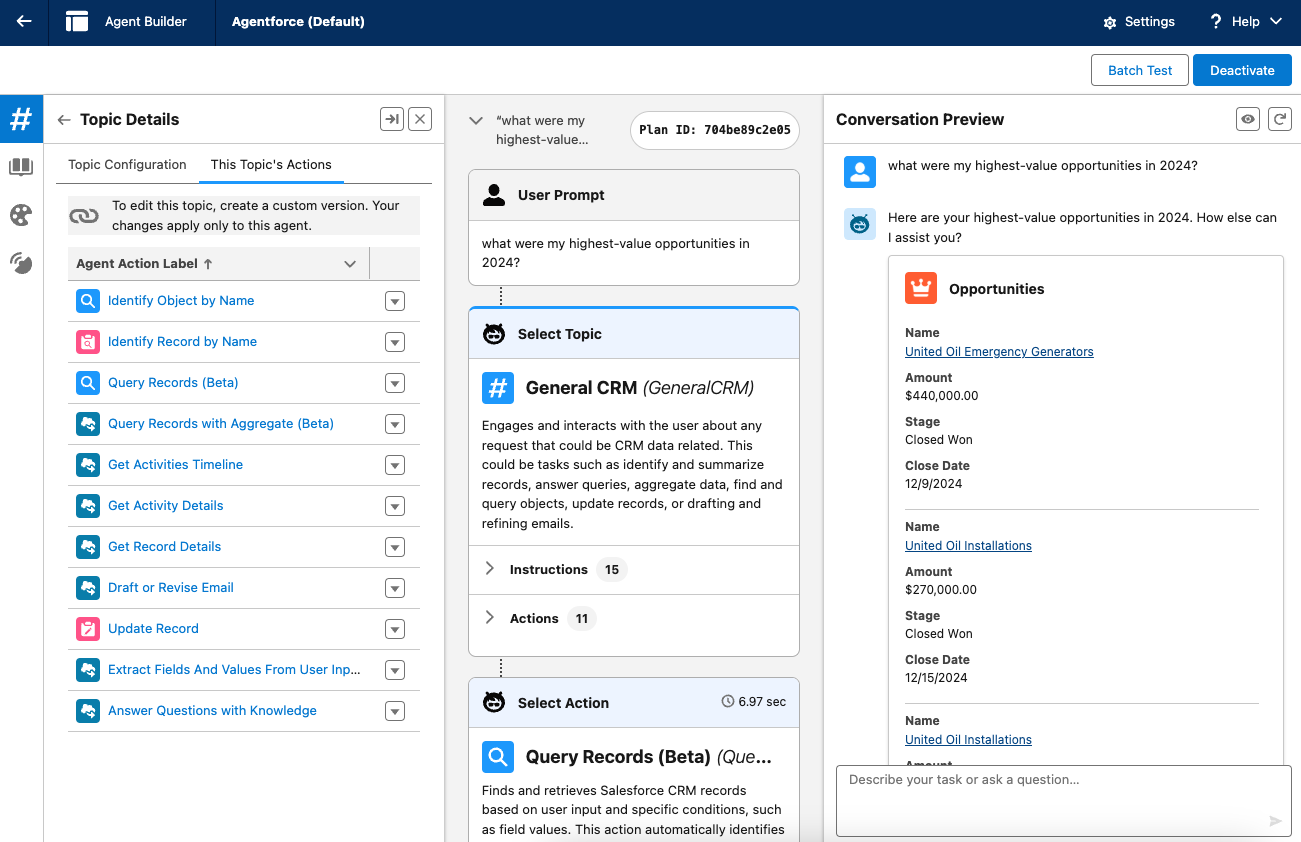
If you’re curious how Agentforce is actually parsing your prompt and identifying the correct actions to take, navigate over to Plan Tracer in the middle column where you can scroll through a step-by-step breakdown of the reasoning process.
2. Explore the Plan Tracer
It’s time to get into the weeds! Head over to Plan Tracer in the middle column for a granular view of how Agentforce tackles a question. You’ll see your utterance at the top of the column, followed by the topic Agentforce has classified it under. For a step-by-step breakdown of the actions Agentforce will take, click open the “Actions” tab to see all the actions at your agent’s disposal, then scroll down to the “Select Action” section to see the one it chose.
Plan Tracer is an excellent place to start your unit testing. If Agentforce chooses the wrong topic or actions, that tells you that the LLM needs more guidance. You can troubleshoot by tweaking the agent’s instructions and adding/removing actions.
But as we all know, AI-generated responses are non-deterministic, so how do we test Agentforce at scale?
3. Create AI test cases, using AI
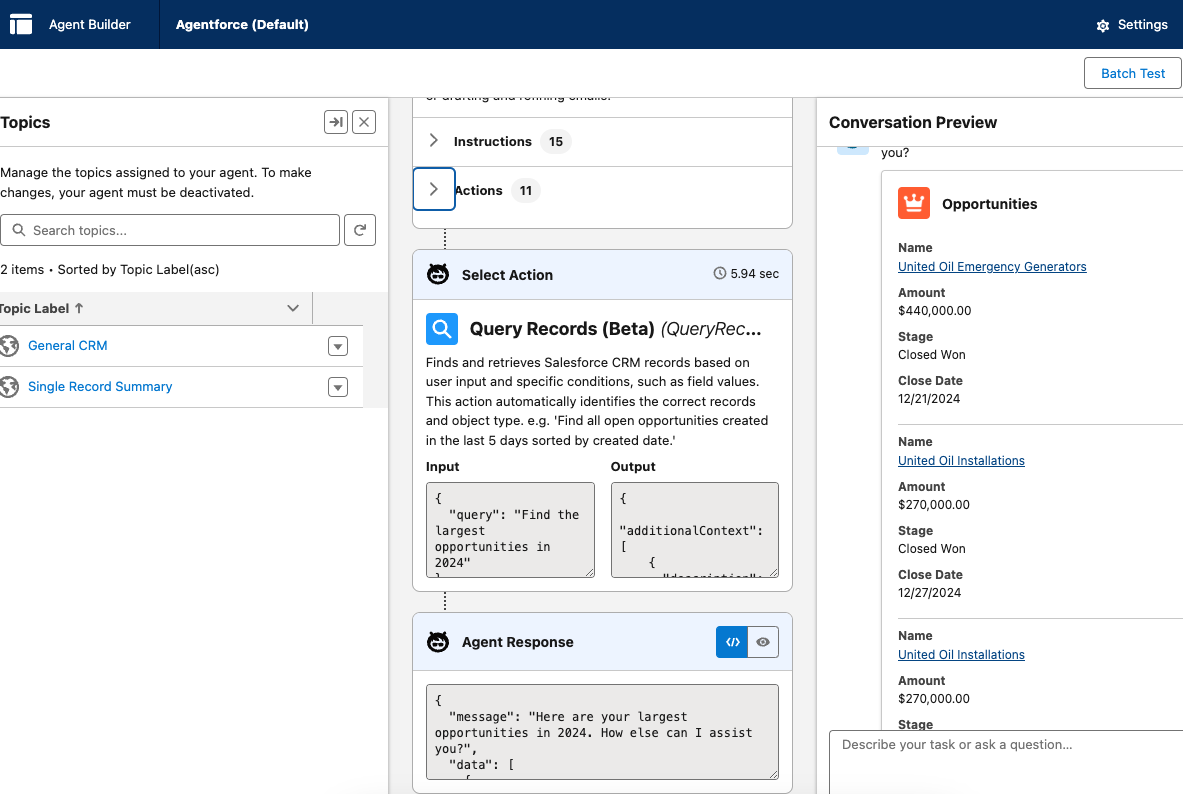
After 30 minutes or so of playing around with different actions, I noticed the shiny “Batch Test” button in the upper-right-hand corner.
Clicking “Batch Test” will send you to Testing Center where you can create a New Test. Enter a Test Name, then scroll down and toggle “Generate Test Cases.” Now click “Save & Run.” Behind the scenes, Agentforce is using generative AI to create test cases for you.
You’ll automatically be taken to the Test Results page. Wait a few minutes and hit refresh and you should see something like this:
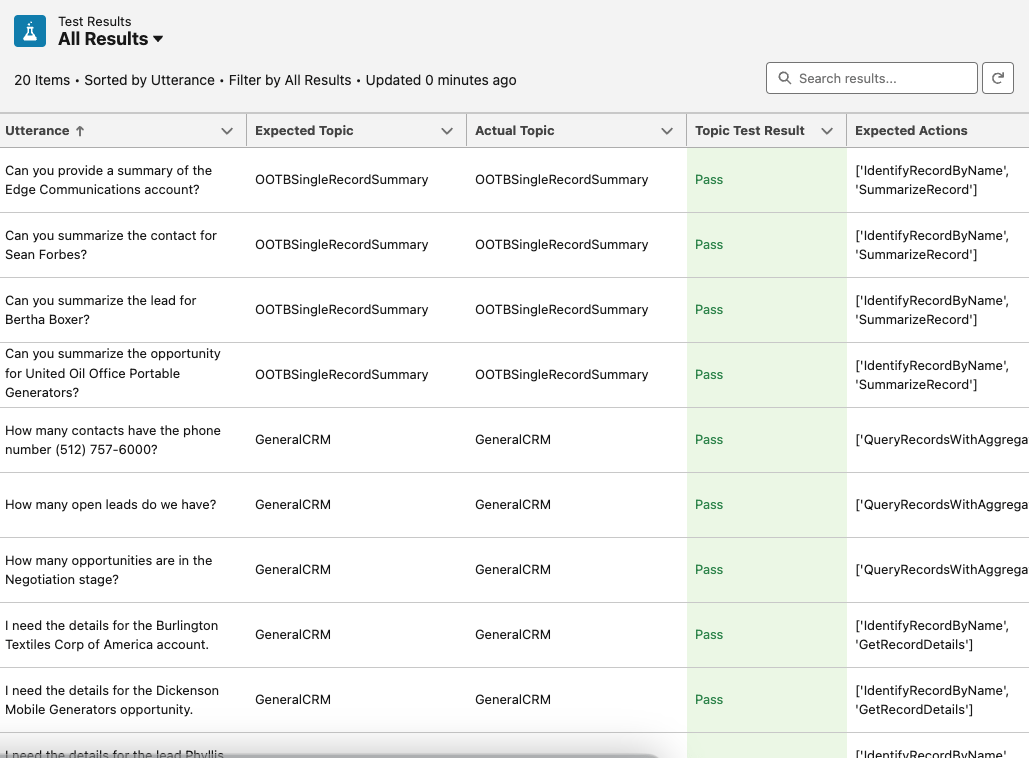
Batch testing gives you a broad sense of how your agent will respond to a varied range of utterances. If this were a production org, a failed test would suggest that you might need to make some changes to the corresponding topic and instructions.
4. Ground your agent with unstructured data (created with AI!)
One of the neatest things I found in Agentforce is how easy it is to upload unstructured data like PDFs and integrate them into your agent’s knowledge base. After trying out a bunch of prompts querying the sample records included with DE org, I wanted to see how my agent would handle new data. To test this out, we need to tweak a few settings.
Click the gear icon in the upper-right-hand toolbar and select “Setup” (if you’re still in Agent Builder, you’ll first need to click the back arrow in the upper-left-hand corner). Type “permission” into the Quick Find bar and select “Permission Sets.” Scroll down to “Data Cloud Admin” (if you see two entries, choose the one with the Data Cloud license). Next, click “Data Cloud Data Space Management.” Click the “Edit” button and make sure the checkmark is enabled next to “default.” Click “Save.”

We also need to enable Knowledge for our org. Navigate back to the Quick Find bar, type in “knowledge” and select “Knowledge Settings.” Click the checkmark and press “Enable Salesforce Lightning Knowledge.”
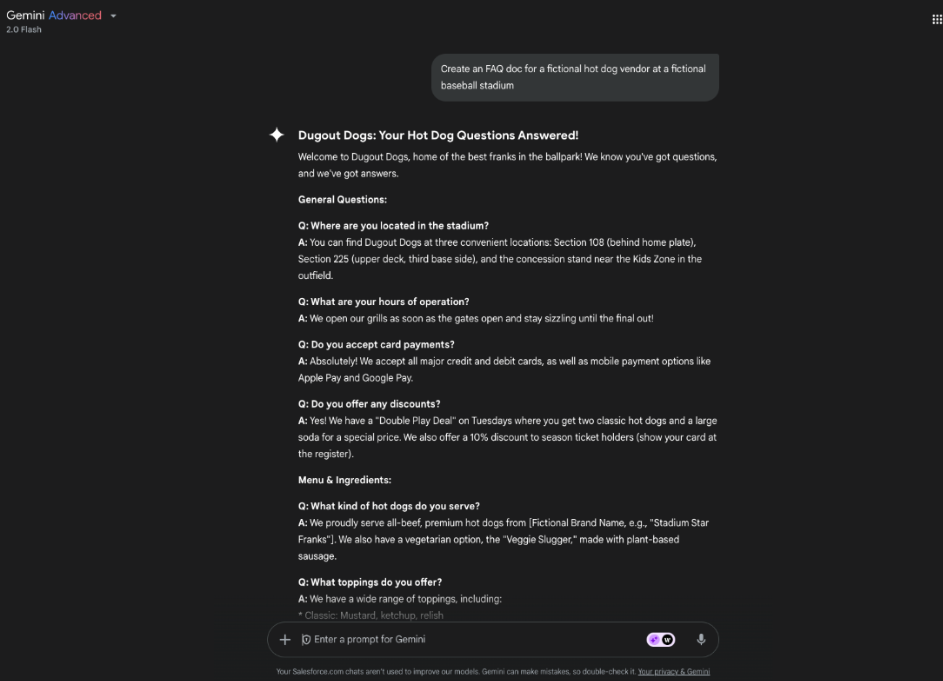
To make sure Agentforce is querying new data rather than the general knowledge contained in its training data, let’s create a fictitious FAQ document. You can generate this using your favorite LLM. We used Gemini.
Naturally, we made an FAQ for a fictional hotdog stand at a fictional baseball stadium, but you can generate whatever knowledge article strikes your fancy.
Copy your FAQ to Google Docs and export it as a PDF. Next, navigate back to Agent Builder and click the “Knowledge” icon in the left-hand sidebar. Click into the “Select a library” bar and choose “+ New Library.” Scroll down, toggle the “File Upload” tab, click “Upload Files” and add your PDF. This can take a few moments… be patient! Once your file uploads, click “Done” and then be sure to hit the “Save” button at the bottom of the screen.
We’ve only had to perform a few mouse clicks, but under the hood, Salesforce has generated Data Lake Objects (DLOs), Data Model Objects (DMOs), and a Search Index in Data Cloud so our unstructured data can be queried semantically by Agentforce. Let’s take a look!
Exit Agent Builder, click the gear icon in the upper-right-hand toolbar and select “Data Cloud Setup.” Expand the hamburger menu in the upper-left-hand corner, click “View All,” and choose “Data Cloud.” You can poke around the tabs here to see your new objects and search index.
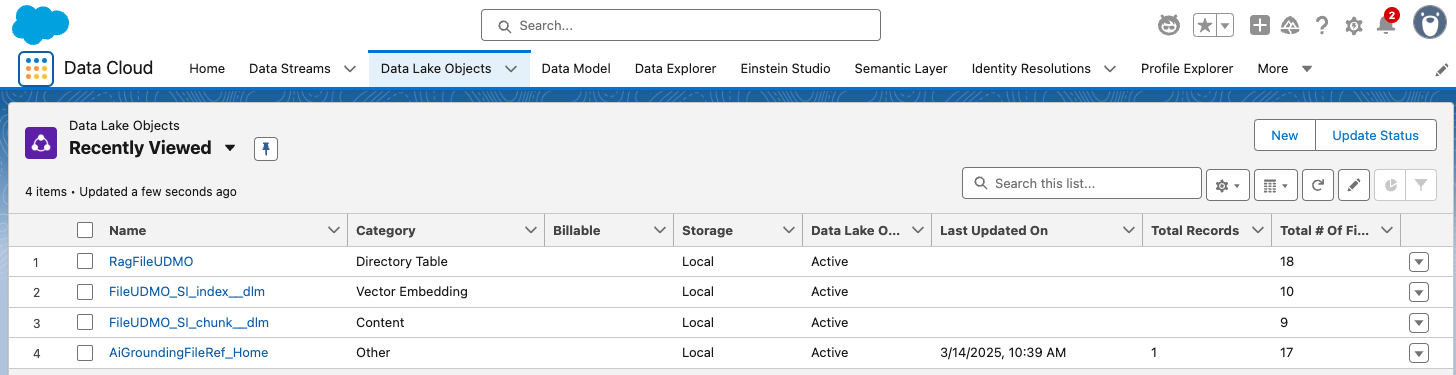
Make sure “Search Index Last Run Status” has moved from “In Progress” to “Ready.”

Before testing your agent, check whether your PDF has finished indexing. Navigate over to the Search Index tab (you might need to use the “More” drop-down menu) and select “Search Index.”
This can take several minutes, so now is a great time for a coffee break. If you run into issues generating the index, click “Rebuild” in the upper-right-hand corner.
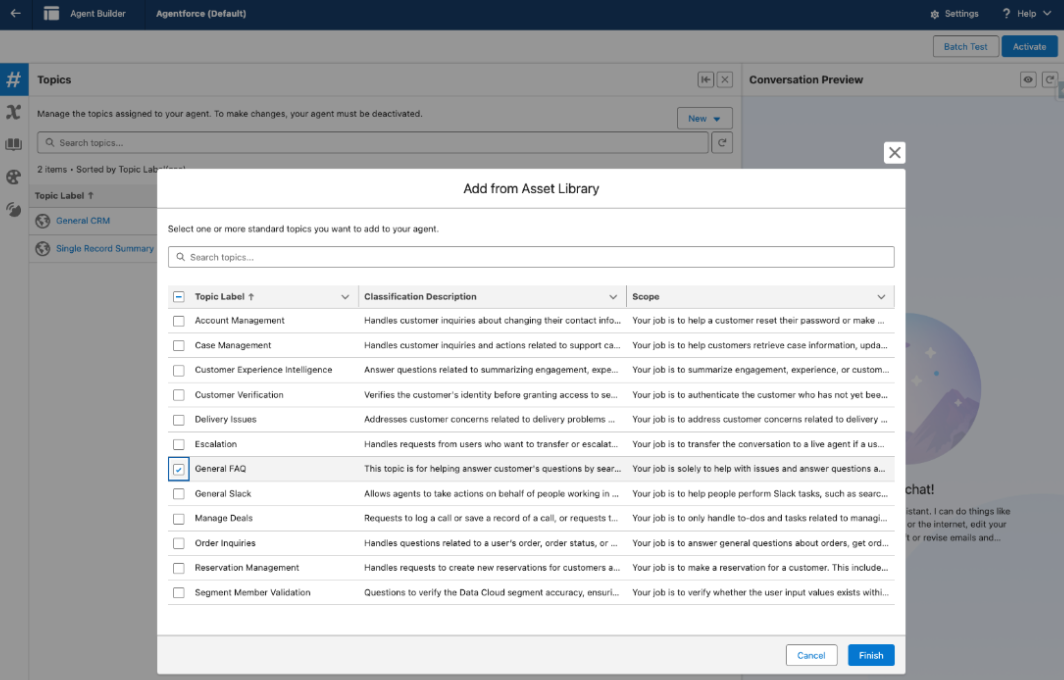
When your Search Index is ready, go back to Agent Builder and press the “Deactivate” button in the upper-right-hand corner so you can add a new topic. Click the “New” button, select “Add from Asset Library” and choose “General FAQ.” Click the checkmark and hit “Finish.”
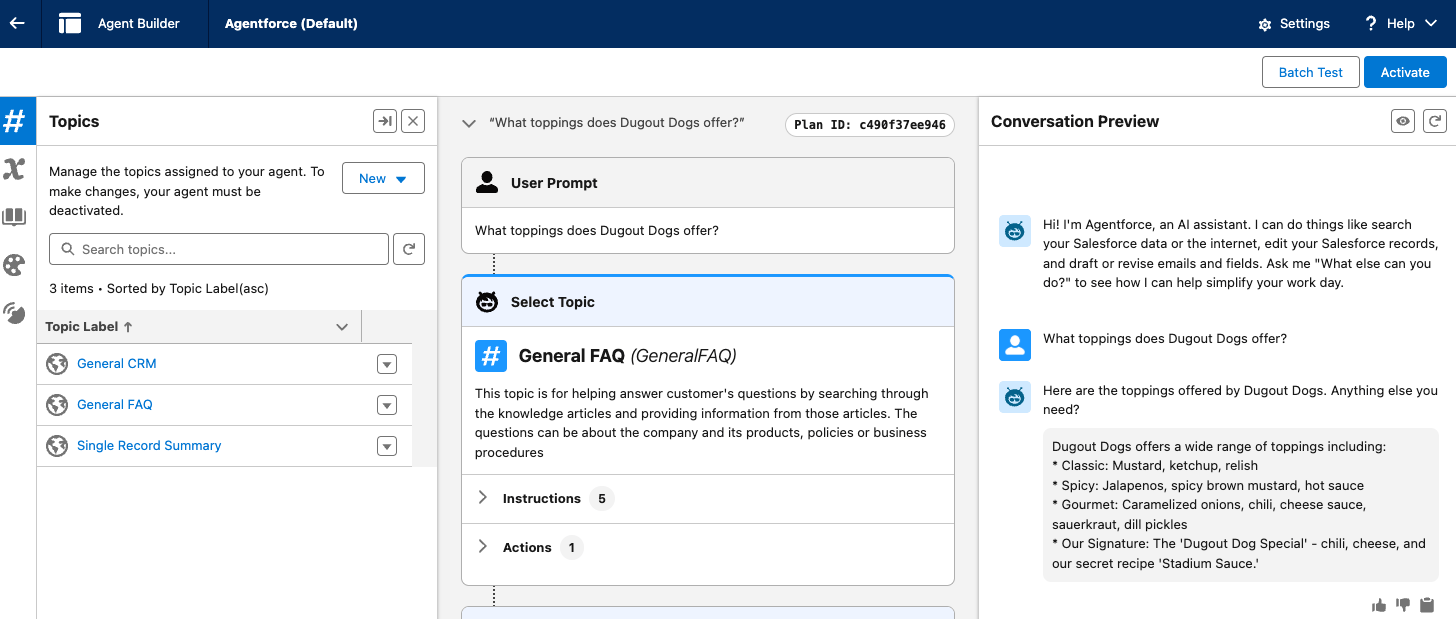
Now, let’s have some fun! Ask your agent “What toppings does Dugout Dogs offer?” You should get an answer that’s accurate to the PDF we uploaded.
5. Create a brand new agent
Now that you’ve grounded the default agent on hotdog FAQs, why not venture out and create a brand new agent for service or setup? Type “agent” into the Quick Find bar, select “Agent Studio” and click “+ New Agent.” Choose the agent type you want to create and hit “Next.” We went with a Service Agent.
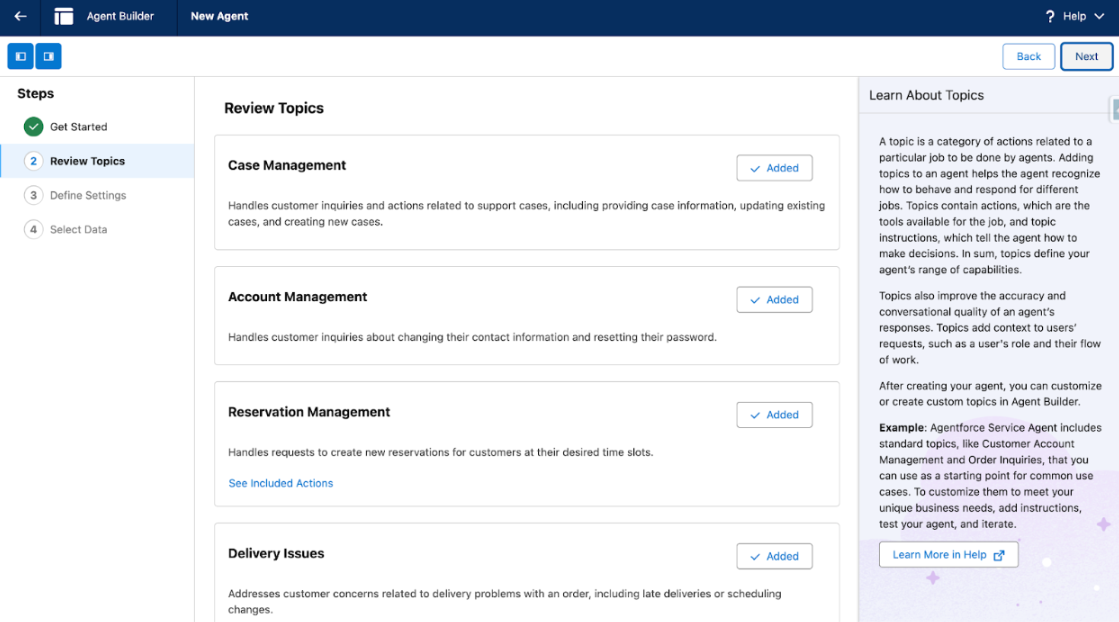
Here, you’ll see the topics that come preloaded with your agent. You can always add more or refine them after the agent is created. Once you’re happy with your topics, click “Next.”
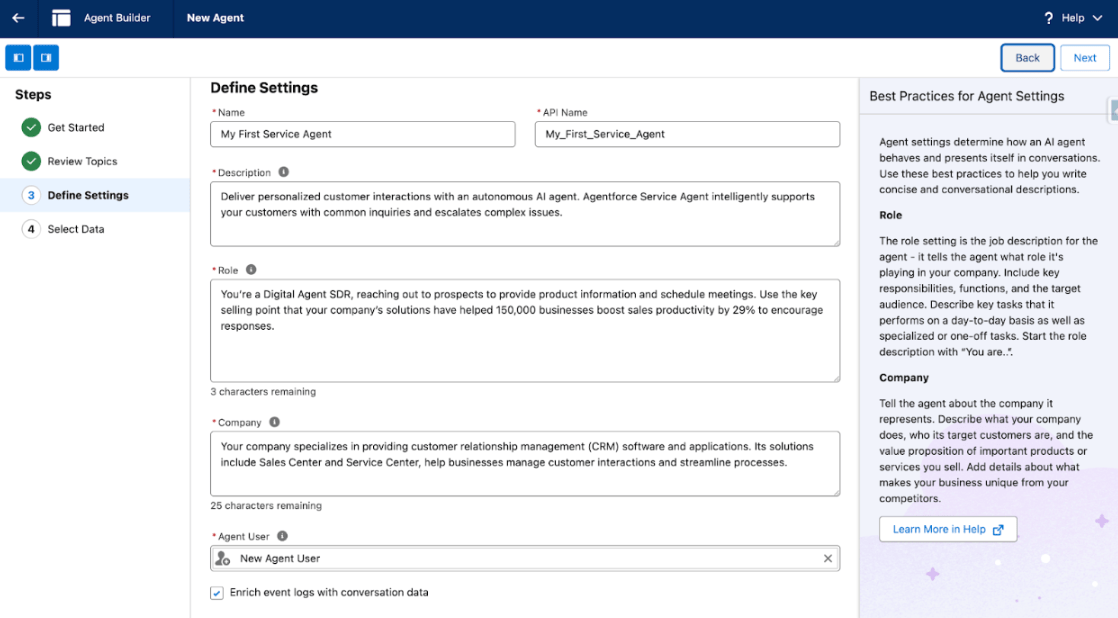
Enter a Name and select “New Agent User” at the bottom (this ensures you can control exactly what permissions the agent has to do its job). You can run with the pre-populated sample text in the Role and Company fields, or tweak both to your liking.
Example Role: You’re a Digital Agent SDR, reaching out to prospects to provide product information and schedule meetings. Use the key selling point that your company’s solutions have helped 150,000 businesses boost sales productivity by 29% to encourage responses.
Example Company: Your company specializes in providing customer relationship management (CRM) software and applications. Its solutions include Sales Center and Service Center, help businesses manage customer interactions and streamline processes.
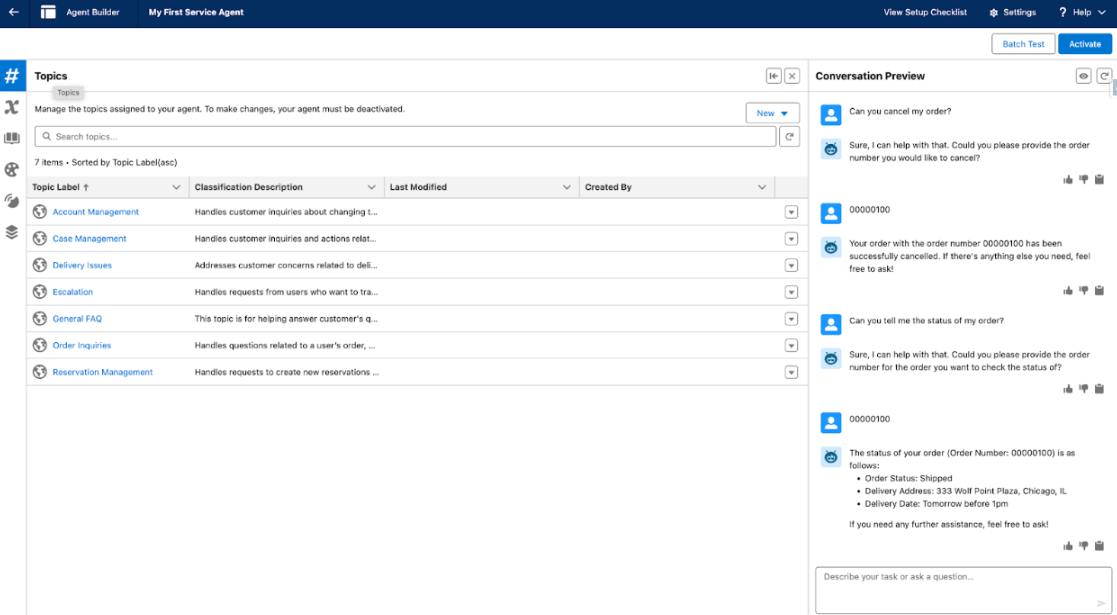
Click the “Next” button in the upper-right-hand corner when you’re ready. On the next screen, click “Create.” You now have your very own Service Agent to test and tweak!
Note that the pre-configured flows rely on Commerce being setup in your DE org (which you can do by typing in Commerce in the Quick Find bar and going to the Commerce Setup Assistant).
Happy exploring!